I have a problem. It has bothered me for years. Allow me to describe the symptoms as simply as I can:
Slumbering
Kick the covers off
I am cold
It’s time to take a stand. So I’m seeking an answer to a simple question: under what conditions do I kick off my covers during the night – and therefore how can I prevent it from happening?
My next thought, like any rational human being, was to set up a DIY Raspberry Pi Sleep Lab.
In practice, getting the metrics I wanted proved not to be so simple. Here is how I set up the experiment, in gory detail. My results are coming soon after I collect enough data to draw some conclusions.
Note: I am not a medical professional and this is not a true sleep lab. I hope to learn something from it, but obviously this would not be a replacement for consulting a physician about an actual condition.
Desired Data:
I set out to detect the following information throughout the night:
- Video of me sleeping (to determine conclusively at what point I kick the covers off. Also shows me relative amount and quality of light in the room)
- Room temperature
- Room humidity
- Body temperature (or at least near-body temperature)
- Sleep position (back/stomach/left/right)
- Sleep State (Awake/Light/Deep/REM)
- Snoring
- Outdoor Temperature
- Thermostat Setting
Equipment:
I had most of these components already laying around from other projects.
- Raspberry Pi
- Raspberry Pi ($40)
- Raspberry Pi Power Adapter ($6)
- Edimax Wifi USB Dongle ($10)
- 16 GB SD Card ($10)
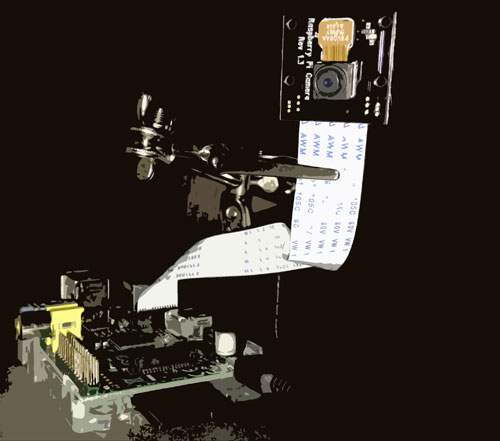
- Camera & Lighting
- Pi NoIR Camera Module ($30) Important: this is a version of the Raspberry Pi Camera Module that has no infrared filter, allowing it to see in the infrared spectrum in addition to the visible spectrum
- Infrared LEDs ($13) and Power Adapter ($7)
- Third Hand Tool ($7) – for holding the Pi Camera in place at just the right angle
- Environment Sensors (any individual one is optional, but I wanted to track all of these things)
- Arduino Uno ($30 – I actually got the $100 introductory kit)
- Breadboard & Cables (included in kit)
- Temp Sensor (for room temp) (included in kit – although mine started malfunctioning so I didn’t use it for this experiment)
- Temp & Humidity Sensor (for room temp & humidity) ($5)
- Long Temp Sensor (for body temp) ($10)
- BodyMedia CORE Armband (good for detecting wake/sleep state) ($100)
- LumoBack (for sleep position data) ($150)
- Zeo (for brain sleep state)
Note: the upcoming Beddit or Withings Aura devices could probably take the place of most of these sensors (plus additionally give me breathing and heart rate data). So once those devices are available I may re-run the experiment with one of them.
Step 1: Set Up the Raspberry Pi
To configure the Pi for exactly what I needed, I adapted this tutorial. I already had Raspbian installed, did my initial config (raspi-config), and ran all the additional updates (apt-get update/upgrade, rpi-update).
During raspi-config I made sure to enable the camera module. Also SSH (under Advanced).
Step 2: Get WiFi Working
I shut down the Pi, disconnected from power, and then plugged in the WiFi dongle. The reason I disconnected from power is because in my experience plugging in the USB dongle causes the Raspberry Pi to lose power and reboot. I don’t think I’m the only one. So I like to have it off before plugging in the dongle just to be sure I’m not at risk of frying anything.
It’s nice to have the Pi hooked up to an actual screen and keyboard (rather than SSH) for this initial setup.
I booted up and logged in. Then:
$ ifconfig -a eth0 Link encap:Ethernet HWaddr NN:NN:NN:NN:NN:NN UP BROADCAST MULTICAST MTU:1500 Metric:1 RX packets:0 errors:0 dropped:0 overruns:0 frame:0 TX packets:0 errors:0 dropped:0 overruns:0 carrier:0 collisions:0 txqueuelen:1000 RX bytes:0 (0.0 B) TX bytes:0 (0.0 B) lo Link encap:Local Loopback inet addr:127.0.0.1 Mask:255.0.0.0 UP LOOPBACK RUNNING MTU:65536 Metric:1 RX packets:0 errors:0 dropped:0 overruns:0 frame:0 TX packets:0 errors:0 dropped:0 overruns:0 carrier:0 collisions:0 txqueuelen:0 RX bytes:0 (0.0 B) TX bytes:0 (0.0 B) wlan0 Link encap:Ethernet HWaddr NN:NN:NN:NN:NN:NN UP BROADCAST MULTICAST MTU:1500 Metric:1 RX packets:0 errors:0 dropped:0 overruns:0 frame:0 TX packets:0 errors:0 dropped:0 overruns:0 carrier:0 collisions:0 txqueuelen:1000 RX bytes:0 (0.0 B) TX bytes:0 (0.0 B) |
This output indicated the Pi recognizes the dongle is plugged in. Next I needed to let it know it should use the dongle to connect to the Internet. For this section I modified this excellent tutorial.
Add my WiFi network information
Edited the wpa_supplicant file:
$ sudo nano /etc/wpa_supplicant/wpa_supplicant.conf |
I made it look like this, being sure to put in my WiFi network name and password as the ssid and psk, respectively:
ctrl_interface=DIR=/var/run/wpa_supplicant GROUP=netdev update_config=1 network={ ssid="Your SSID Here" proto=RSN key_mgmt=WPA-PSK pairwise=CCMP TKIP group=CCMP TKIP psk="Your WiFi Password Here" } |
Exit with ctrl-x and save when prompted.
Tell the Pi to use WiFi when the dongle is plugged in
Next I want to edit the Network Interfaces file.
$ sudo nano /etc/network/interfaces |
I’m using DHCP, so I edited the file to look like this:
auto lo iface lo inet loopback iface eth0 inet dhcp allow-hotplug wlan0 iface wlan0 inet manual wpa-roam /etc/wpa_supplicant/wpa_supplicant.conf iface default inet dhcp |
Again exit with ctrl-x and save.
Restart the network interface to see if it worked
Now I need to bring down the interface and turn it back on:
$ sudo ifdown wlan0 $ sudo ifup wlan0 |
I got some error messages, but it turned out to be okay. The true test is to run iwconfig:
$ iwconfig wlan0 IEEE 802.11bgn ESSID:"Your SSID Here" Nickname:"<WIFI@REALTEK>" Mode:Managed Frequency:2.437 GHz Access Point: NN:NN:NN:NN:NN:NN Bit Rate:65 Mb/s Sensitivity:0/0 Retry:off RTS thr:off Fragment thr:off Power Management:off Link Quality=100/100 Signal level=89/100 Noise level=0/100 Rx invalid nwid:0 Rx invalid crypt:0 Rx invalid frag:0 Tx excessive retries:0 Invalid misc:0 Missed beacon:0 lo no wireless extensions. eth0 no wireless extensions. |
Prevent WiFi dongle from sleeping
With the settings above, I used to have all kinds of trouble using SSH to connect to my Pi when it was on WiFi. The connection was unreliable. Turns out that was the WiFi dongle going to sleep. That’s fine if I’m using the Pi directly, but if I need to connect to it from another machine, it needs to stay on the network all the time in order to be available on-demand. So here’s how I told the USB dongle to stay awake (this process may be different for other dongles – gosh that’s a fun word):
$ sudo nano /etc/modprobe.d/8192cu.conf |
This creates a new conf file. In the file, I put:
options 8192cu rtw_power_mgnt=0 rtw_enusbss=0 |
ctrl-x and save.
Assign the Pi its own local IP address
I don’t want to have to hunt down the Pi’s IP address every time I want to connect. So I logged into my router and assigned the Pi a local static IP. The method for this will be different depending on the router. It’s not absolutely necessary but makes life a lot easier. Otherwise there’s also NMAP that I can run from my mac. But that’s still kind of a hack since I have to figure out which device is the Pi. Static IP is easier.
Step 3: Set Up Pi NoIR Camera for Overnight Surveillance
As far as the software is concerned, the Pi NoIR camera is identical to the regular Raspberry Pi Camera Module, so any tutorials for that will work for this as well.
Enable the Camera
First, I double checked that I enabled the camera module in raspi-config.
Plug In the Camera Board
sudo halt the Pi so I can plug in the camera.
It slides into the black port just behind the Ethernet port. The gold connectors on the ribbon should face away from the Ethernet port. This video has very clear instructions on how to do this.
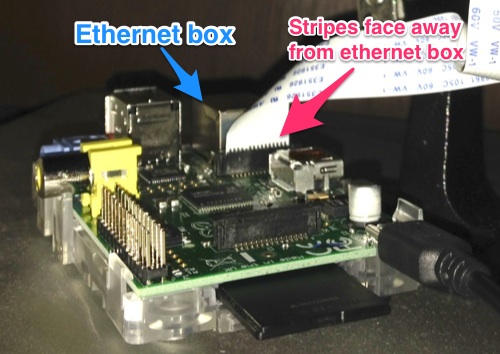
Booted up the Pi again and tested that the camera was working (it’s helpful to have the Pi plugged directly into a monitor at this point via HDMI or analog):
$ raspistill -t 5000 |
This makes the red light on the Pi Camera module turn on for 5 seconds and then turn off. Simultaneously, I saw a live video feed from the camera appear on the monitor I had connected to the Pi’s HDMI port. The video should last for 5 seconds and then go away.
Troubleshooting
At this point I briefly ran into a problem: whenever I launched raspistill it would hang. The camera’s red light would come on but I wouldn’t get any video stream and the light wouldn’t turn off after 5 seconds. It just stayed on, even after ctrl-c. Camera was basically non-responsive (although the Pi itself seemed fine). Finally solved this by shutting down the Pi, disconnecting the camera, and reconnecting it. Something about the physical connection wasn’t quite right and adjusting it fixed it (thanks, Stack Exchange!).
So anyway, at this point I had video, so good so far.
In addition to raspistill there is also a function called raspivid but neither of these really worked for my purposes. I was setting up more of a timelapse cam, so I only needed a framerate of about 1 frame for every 5 seconds. And it’s important that I have accurate timestamp data because I’ll need to line up the video with my other data streams later – so this makes me want to save out still JPEGs instead of one big video file, and save each of them with a timestamp in the filename as well as overlaid on the image itself.
Install a custom version of Motion
There is a fantastic program out there called Motion that has an enormous feature set, including overlaying timestamp data directly onto each frame. It can be set up to record video only when the camera senses movement (sweet!) although for this experiment I preferred to get frames at regular intervals for the whole night (which it can also do).
Motion works with USB webcams connected to the Pi, but it takes some hacking to get it to work with the Pi Camera module. Fortunately someone has done exactly that.
First, I followed this tutorial from
sudo apt-get install motion |
on down until I got to the step where you set up the configuration file:
nano motion-mmalcam.conf |
I made some modifications that are necessary for this project to work. I used ctrl-w to search through the document to find each of these settings.
logfile /home/pi/mmal/motion.log ... width 1024 height 576 framerate 2 #doesn't matter too much since minimum_frame_time will intercede minimum_frame_time 5 mmalcam_use_still on emulate_motion on output_pictures on ffmpeg_output_movies off ffmpeg_timelapse 0 snapshot_interval 0 text_right %Y-%m-%d\n%T-%q text_left Pi-cam %t text_event %Y%m%d%H%M%S target_dir /home/pi/m-video snapshot_filename %Y%m%d%H%M%S-snapshot picture_filename %Y%m%d%H%M%S-%q movie_filename %Y%m%d%H%M%S timelapse_filename %Y%m%d-timelapse |
These settings tell Motion to act as though movement is constantly being detected. Instead of outputting a video file, it outputs a jpeg frame every 5 seconds. That frame is saved as a JPEG with a timestamp as its filename. By default it includes an “event” number in the filename, events being a number that gets incremented every time the program detects movement. Later on I used Quicktime to easily combine all the JPEGs into a video file, but I found that the event number throws things off, so I eliminated it from the JPEG filenames.
I left the width and height at 1024×576 because it was the highest of the three tested resolutions. Because I’m only grabbing 1 frame every 5 seconds and I’m using a 16GB SD Card, space isn’t too much of a concern (running Motion for ~7 hours overnight gave me ~5000 jpeg frames at ~40KB per frame, totaling ~200 MB).
Once I made the changes, I ctrl-x to close the file, confirming that I want to save.
To help avoid confusion about which version of Motion I’m using, I renamed this custom version of Motion:
$ mv motion motion-mmal |
Now I can start Motion using this command (making sure I’m in the mmal directory):
$ ./motion-mmal -n -c motion-mmalcam.conf |
When I do this, the Pi Camera’s red light turns on. This also starts a live video stream that I can see via HDMI, and access from my macbook using a browser (type the Pi’s IP address into the address bar with port 8081 – e.g. http://192.168.1.5:8081) or VLC player (Open Network – command-N).
ctrl-c stops the video stream.
I also used the instructions at this tutorial to create a “startmotion” and “stopmotion” script to make starting and stopping the process easier to do and remember.
Camera Test
My last stage was to bring the Pi into the production location and get the lighting and camera positioned. I did a sudo halt, disconnected the Pi from my monitor and took it to my room.
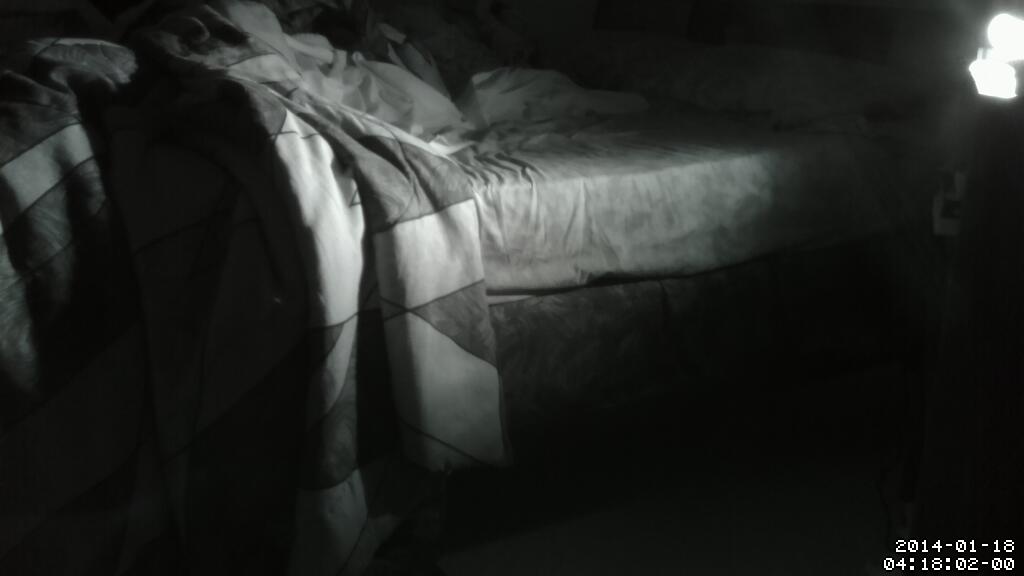
Camera Position
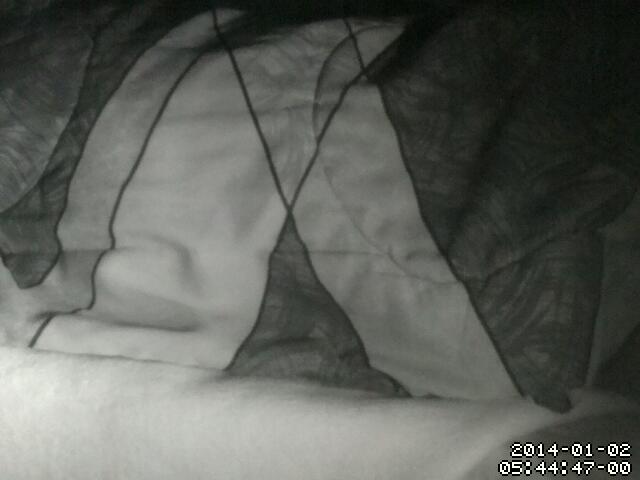
My very first camera test was not in an ideal location – too close up to be able to really see what was going on with the covers
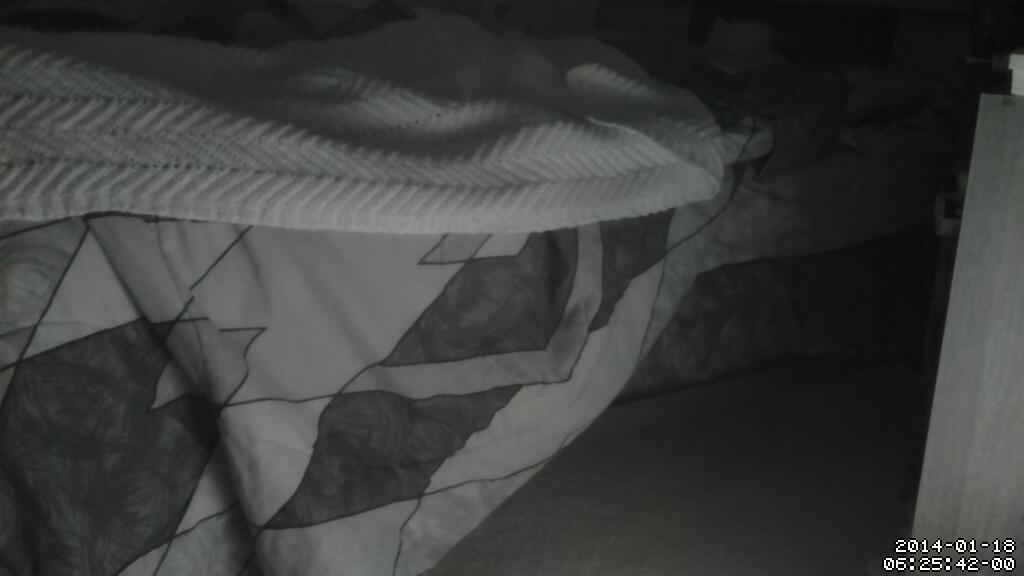
Fixed this on my next try.
I found a bookshelf that was within range of my power outlet and set the Pi on it. I used the third hand tool to keep the Pi in place and angle the camera. Then I brought my Macbook in and started an SSH session into the Pi from Terminal using
$ ssh [pi's.ip.address] |
Then entered the password and once in I started the video feed:
$ cd mmal $ ./startmotion |
Red light turns on, all is well. I connected to the feed in VLC on my Mac and used that as my viewfinder to tweak the camera angle (note: I usually experience 5-10 seconds of lag between adjusting the camera and seeing it update in VLC). I found an angle where I could see the top, side, and floor just beneath my bed, so I could clearly tell where the covers were at any given time, and also visually see what contortions I might go through during the night.
Update: I have since discovered that starting Motion and viewing the feed is even easier from my iPhone than from my Mac (much simpler form factor for this environment). The iOS Server Auditor app provides a fantastic SSH terminal into the Pi, and the VLC app works better than Safari mobile for viewing the feed. Remember to turn on the phone’s WiFi connection or these apps won’t be able to connect.
Lighting
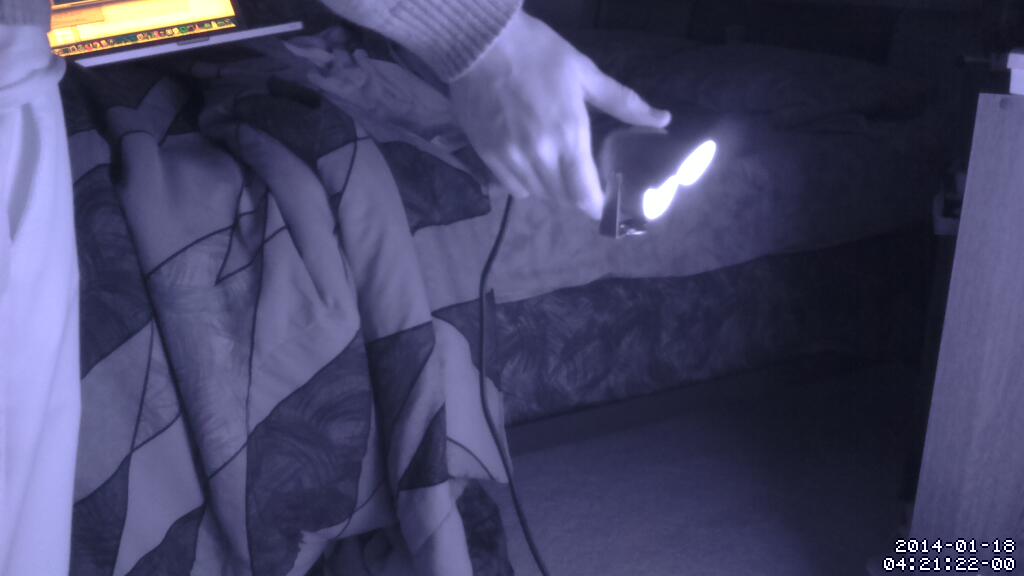
Lighting is a little bit tricky in that I can’t see the infrared light with my own eyes. It’s just a super faint red glow. So: with my Mac still connected to my video feed I turned off all the regular lights, plunging the room into near-darkness and navigating by the glow from my laptop.

Wow, you can tell I’m using f.lux. And yes… I may have lost some sleep while setting this up.
I plugged in the infrared LEDs and watched the video feed on my computer screen to see what angle worked best. The LEDs are very bright when viewed through the camera, so I found that I actually got better, more even, less intense illumination by aiming the light directly at a white wall from about 2-3 feet away. That way the light dispersed before hitting the bed and me, contrast was decreased, and the camera could see more.
Nope – lighting is too direct, producing dark shadows I can’t see into
Ah, now we’re onto something.
Initially I was concerned about shining a light on myself all night (even if it’s not visible) because of the way light is supposed to affect melatonin production, circadian rhythms, yada yada, but this leads me to think that it probably wouldn’t have much effect because IR light is on the red end of the spectrum. But regardless, diffusing the light seems to be better all the way around for this experiment.
The infrared light is placed just below the frame on the right side, and is pointing at a white wall near the nightstand, which diffuses the light into the room.
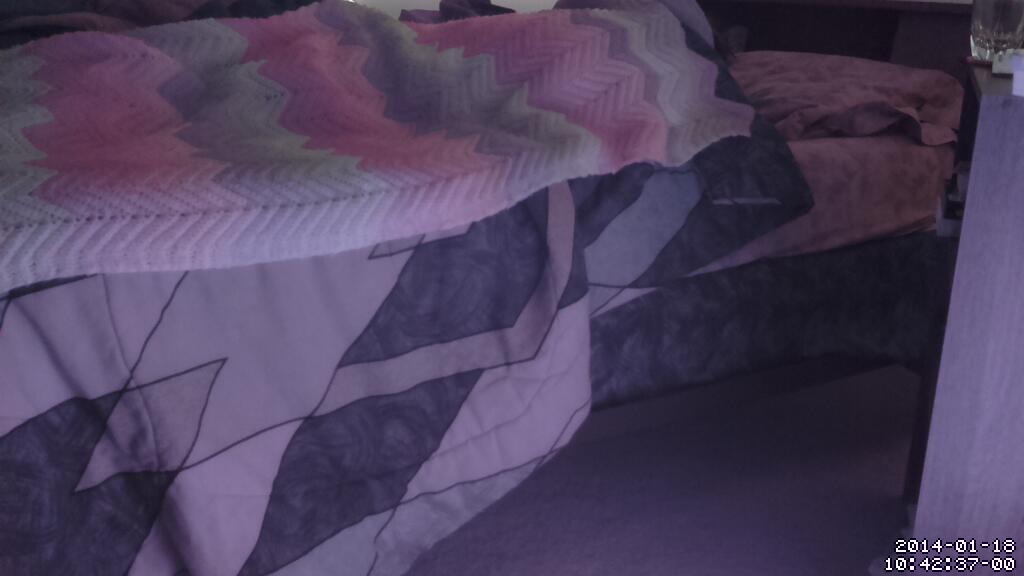
The IR light is still on, but as daylight returns in the morning, it’s cool to see the colors return to my top blanket – they’re not visible by IR light alone.
At this point, the Raspberry Pi is ready to watch me sleep through the night. If I were solely combining this with other off-the-shelf sleep monitors, then I’d say I’m done. But in my case I wanted to set up some sensors that would give me data I couldn’t get from the BodyMedia armband or the LumoBack or Zeo Sleep Manager. So at this point this project also becomes an Arduino Sleep Lab. But I’ll still be using the Raspberry Pi to receive and record the data from the Arduino.
Step 4: Sensor Madness
Although it’s possible to plug sensors directly into the Pi using its GPIO pins and the Pi Cobbler, I already had most of these sensors working with the Arduino Uno from previous projects. And I discovered that it is very easy to get the Arduino to send values to the Pi via a long USB cable, which would also allow me to place the sensors closer to me than to the Pi (which is convenient because the Pi camera needed to maintain a certain distance). I used two sensors:
- DS18B20 – A temp sensor at the end of a long cable that I could place under myself while sleeping. Modified this tutorial
- DHT11 – A combo temp & humidity sensor to measure ambient room temp & humidity. Used this library.
Here’s how I hooked everything up:
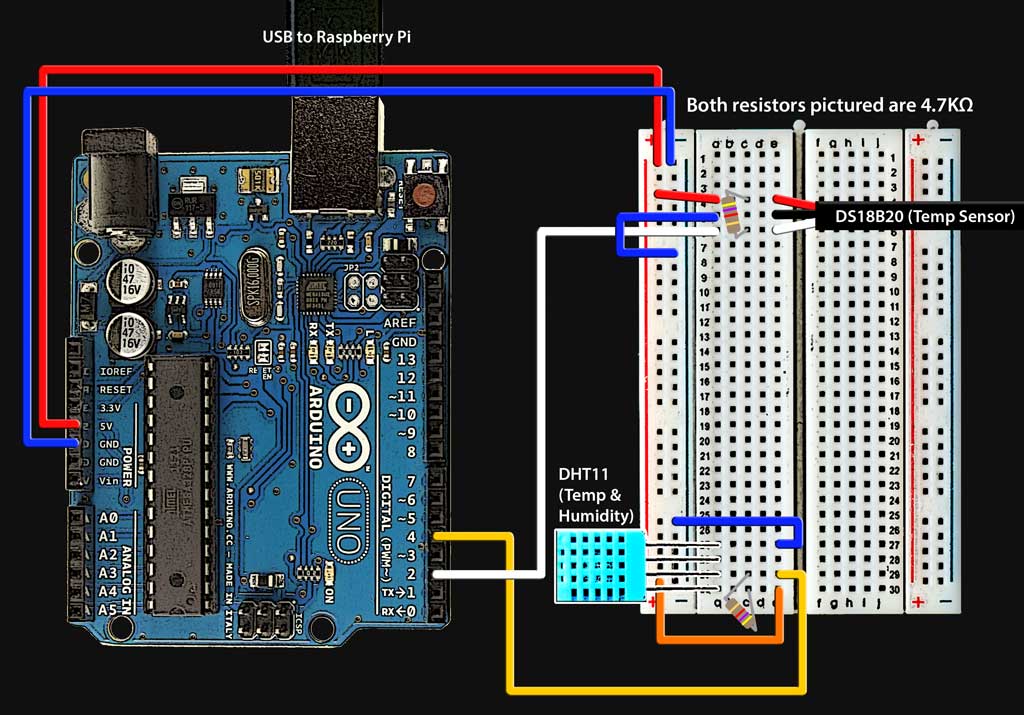
Arduino connected to the DHT11 & DS18B20 Temp Sensors. Resistors are 4.7KΩ
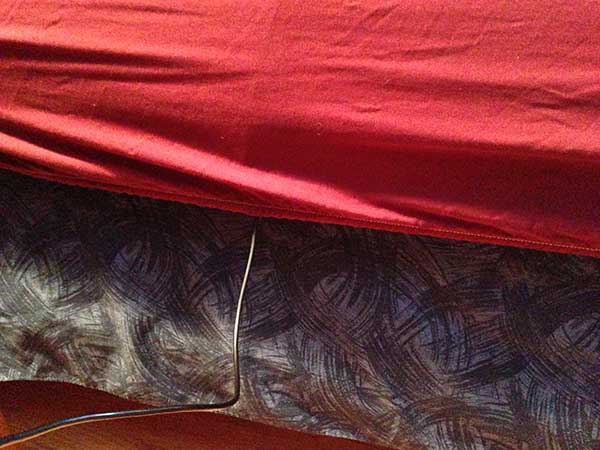
DS18B20 Temp Sensor cable fed under my bottom sheet so the tip is between my lower back and the mattress. When it’s under the small of my back I can’t even feel it. It’s probably not getting true body temperature readings, but I’m still hoping to be able to correlate it to my sheet-kicking data.
Here is my finished Arduino sketch, which tells the Arduino to send the following comma-separated row of data over serial USB once per minute:
humidity(%),roomTempF,bodyTempF
And here’s the Arduino sketch that gets me that:
1 2 3 4 5 6 7 8 9 10 11 12 13 14 15 16 17 18 19 20 21 22 23 24 25 26 27 28 29 30 31 32 33 34 35 36 37 38 39 40 41 42 43 44 45 46 47 48 49 50 51 52 53 54 55 56 57 58 59 60 61 62 63 64 65 66 67 68 69 70 71 72 73 74 75 76 77 78 79 80 81 82 83 84 85 | #include <OneWire.h> #include <dht11.h> int DS18S20_Pin = 2; //DS18S20 Signal pin on digital 2 dht11 DHT11; //Temperature chip i/o OneWire ds(DS18S20_Pin); // on digital pin 2 void setup(void) { DHT11.attach(4); Serial.begin(9600); } void loop(void) { //DHT11 Temp and Humidity Sensor getHumidity(); Serial.print(","); //OneWire Long Temp Sensor float onewireTemperature = getTemp(); onewireTemperature = onewireTemperature*9/5+32; Serial.println(onewireTemperature); delay(60000); //take the reading once per minute } void getHumidity(){ Serial.print((float)DHT11.humidity, 2); Serial.print(","); Serial.print(DHT11.fahrenheit(), 2); } float getTemp(){ //returns the temperature from one DS18S20 in DEG Celsius byte data[12]; byte addr[8]; if ( !ds.search(addr)) { //no more sensors on chain, reset search ds.reset_search(); return -1000; } if ( OneWire::crc8( addr, 7) != addr[7]) { Serial.println("CRC is not valid!"); return -1000; } if ( addr[0] != 0x10 && addr[0] != 0x28) { Serial.print("Device is not recognized"); return -1000; } ds.reset(); ds.select(addr); ds.write(0x44,1); // start conversion, with parasite power on at the end byte present = ds.reset(); ds.select(addr); ds.write(0xBE); // Read Scratchpad for (int i = 0; i < 9; i++) { // we need 9 bytes data[i] = ds.read(); } ds.reset_search(); byte MSB = data[1]; byte LSB = data[0]; float tempRead = ((MSB << 8) | LSB); //using two's compliment float TemperatureSum = tempRead / 16; return TemperatureSum; } |
Now the Raspberry Pi needs to know how to receive it. I installed the PySerial library, which is an easy way for the Pi to communicate over its USB port.
Install PySerial on the Raspberry Pi
Download the latest PySerial source.
Save the pyserial-2.7.tar.gz file somewhere on the Pi and then cd into that directory.
Next I unzipped the file and then did a cd into the folder that gets created:
$ tar -xvzf pyserial-2.7.tar.gz $ cd pyserial-2.7 |
Now I can actually do the install:
$ sudo python setup.py install |
Next I followed this tutorial, to actually write my Python script.
Here is my sleeplogger.py Python data logger script, which I save to the Pi in the mmal directory with the rest of my files:
1 2 3 4 5 6 7 8 9 10 11 12 13 14 15 16 17 | import serial import csv import datetime ser = serial.Serial('/dev/ttyACM0', 9600) #use this line when running this script on the Raspberry Pi #ser = serial.Serial('/dev/tty.usbmodemfa131', 9600) #use this line when running this script on my Mac flag = 0; while 1 : ts = str(datetime.datetime.now()).split('.')[0] out = ser.readline() out = ts+","+str(out) if flag > 0: print(out) file = open("sleep_temp_hum_data.csv", "a") file.write(out) file.close() else: flag = 1 |
Time to test that it’s working. I plug the Arduino into the Raspberry Pi’s USB port. Then I cd into the mmal directory and run the sleeplogger.py script:
$ python sleeplogger.py |
Command-line outputs should start appearing that resemble this:
2014-02-28 02:56:54,35.00,73.40,66.09
Hey, data!
Stop the script when ready using ctrl-c.
NOTE: the script is set to communicate only once every minute. For testing purposes, I found it useful to temporarily increase the output frequency in the Arduino sketch and reload it onto the Arduino.
I also double checked that the data were being recorded, not just output to the command line. Doing an ls in the mmal directory should reveal a file called sleep_temp_hum_data.csv. sudo nano into it just to double check that records were recorded and the formatting looks okay.
Auto-activate sensors when video starts
Next I added the python script activation/deactivation to the startmotion and stopmotion scripts so that I can have everything start and stop at the same time with a single command.
$ sudo nano startmotion |
Then add a new line 2 so that the full file looks like this:
1 2 | #!/bin/sh nohup python ~/mmal/sleeplogger.py 1>/dev/null 2>&1/dev/null 2>&1 |
Then ctrl-o and ctrl-x to save and exit the file.
$ sudo nano stopmotion |
Then add a new line 2 so that the full file looks like this:
1 2 3 | #!/bin/sh ps -ef | grep sleeplogger | awk '{print $2}' | xargs kill ps -ef | grep motion-mmal | awk '{print $2}' | xargs kill |
Then ctrl-o and ctrl-x to save and exit the file.
Then I tested everything out again by running ./startmotion and ./stopmotion, and reset my Arduino sketch back to once per minute.
Run the experiment
At long last I’m ready to run the experiment. Since initially writing this I’ve actually captured a few full nights worth of data, and everything is working. Unfortunately, while I was kicking my blanket almost every night before and throughout setting up this experiment, since then the weather has changed and I’ve moved to a new apartment and I don’t seem to be doing it anymore. But there is a good chance that it will begin again with colder weather, and then I’ll be able to use this setup to do my investigation.
To be continued…
[…] Raspberry Pi Sleep Lab How-To by Nick Alexander. Nick was bothered by a common nightly occurrence, kicking off his covers in the middle of the night. Like any enterprising technologist, he enlisted his technical expertise to help examine this problem. This post is an amazingly detailed “How To” for building and setting up your own personal sleep monitoring tool complete with video, environmental information, sound, and sleep data. […]